EZ Rider Ebike Conversion Kit Installation Instructions
This Whole Process Should Take 30 Minutes Max.
EZ Rider Installation is a very simple operation and can be achieved by anyone who can use a screwdriver.
FREE EZ Rider Installation at our Warehouse
EZ Rider Installation is free if you are willing to pop along to our Atherton Near Manchester Facility.
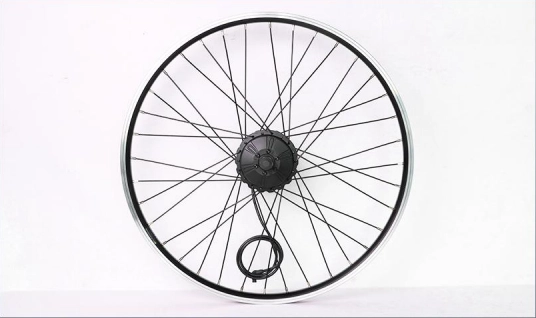
Unpack Wheel
Unpack your wheel from your conversion kit and uncoil the cable.
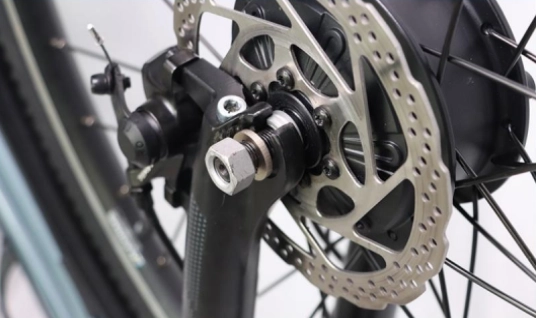
Install Wheel Onto Forks
Install your wheel into the fork dropouts – 74mm & 100mm only supported.
Controller Head Unit Bracket Installation
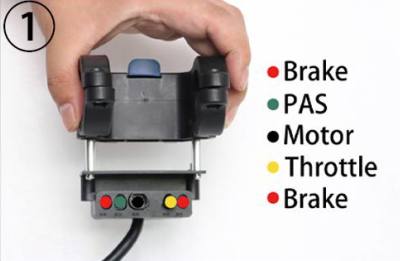
Cable Identification
Please use this colour cordinated image to identify your cable sockets.
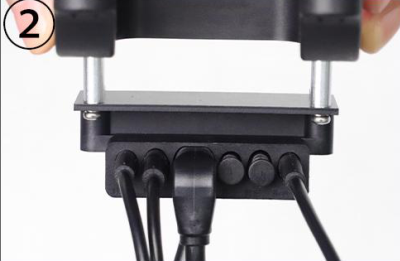
Connect Your Cables
Connect your cables to the correct sockets identified in the previous illustration.
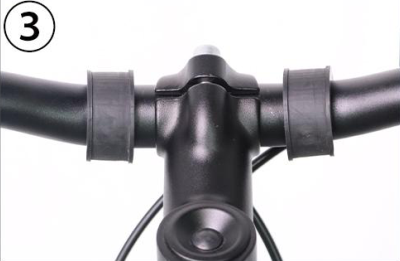
Fit Rubber Bushes
The next stage is to fit the rubber bushes to the handlebars as in the above image.
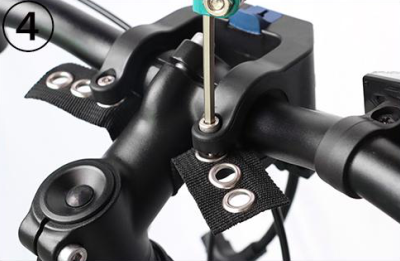
Attach Securing Strap
Use the securing strap and supplied fixings to fit the head bracket to the handlebars.
EZ Rider Pedal Assist Installation
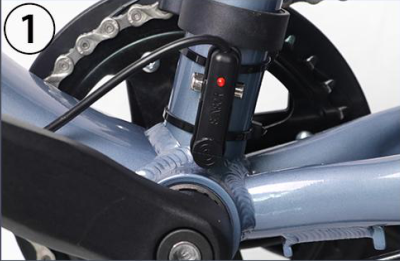
Attach PAS Sensor
Using the cable ties supplied attach the pedal assist sensor to the frame as in this diagram.

Fit Magnetic Disc
Add your magnetic pedal assist disc to pedal crank bottom bracket as shown above.

Disc Securing Ring
Once disc is in position use the securing ring to hold magnetic disc firmly in place
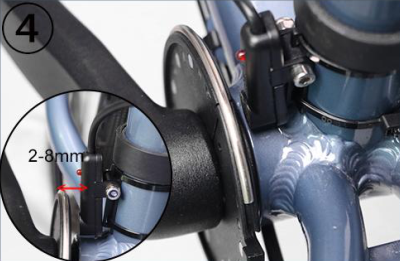
Check Tolerance
Once both are in position then fine tune their proximity making sure they are 2-8mm apart.
EZ Rider Brake Sensor Installation
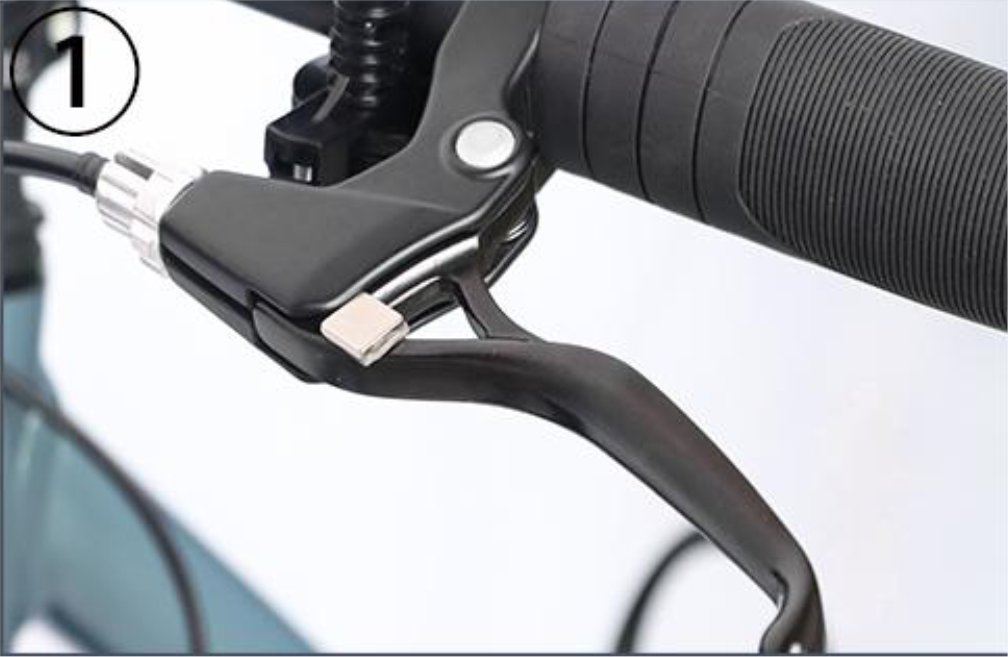
Brake Sensor Magnets
Attach the sensor magnets to the brake levers ensuring they are close to the brake housing.
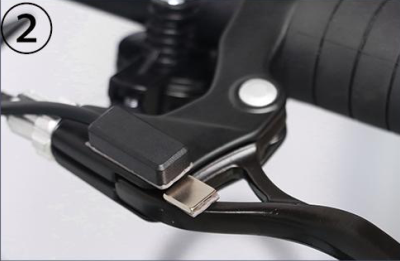
Attach Brake Sensor
Now the next step is to attach the sensor to the brake housing as close to the magnet as poss.
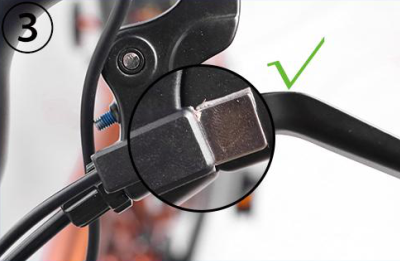
Correct Positioning
In this illustration you can see the correct positioning for the sensor and the magnet proximity.
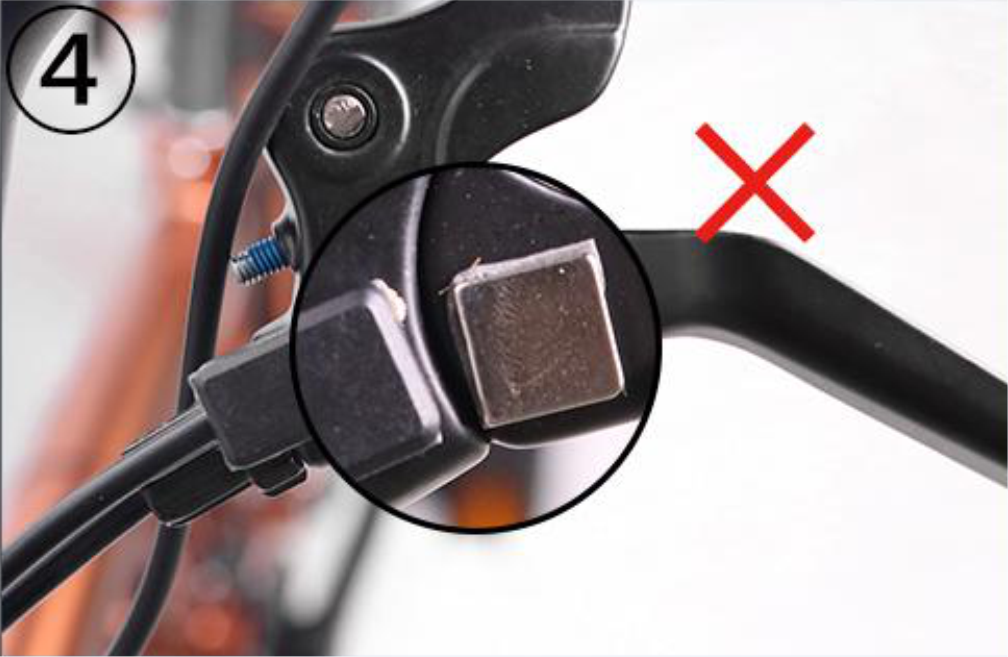
Incorrect Position
In this diagram you can see the incorrect positioning for the sensor and magnet proximity.
Controller Head Unit Installation
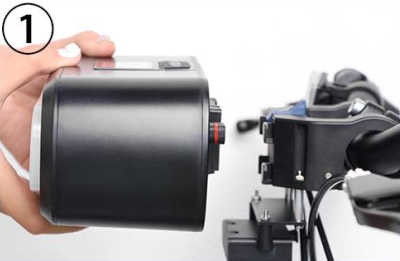
Install Power System
Offer up the controller/battery head unit to the bracket and click into place. Check firmly.
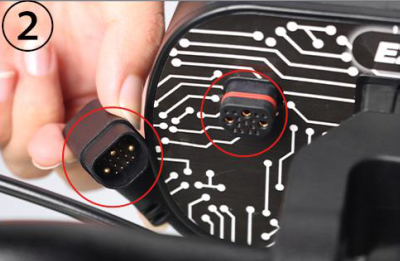
Connect Controller
Using the electrical connectors on the cable and head unit make sure they are lined up correctly.
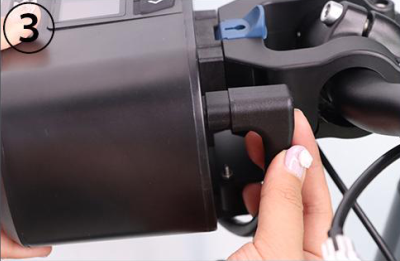
Connect Firmly
Now once aligned connect firmly to ensure a good connection between bracket and head unit.
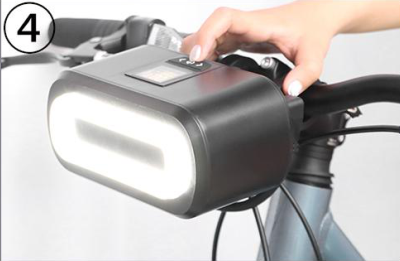
Now Switch On
Once you have completed all these steps you are good to switch on and go on your converted ebike.
UK STOCK - QUICK DELIVERY
All our EZ RIDER plus other conversion kits and parts are stocked in our Atherton near Manchester based warehouse. Quick delivery from inside the UK we do not get our orders dropshipped from abroad.